Needle felting - how to make a felting animal from wool
Needle felting is a fascinating and highly enjoyable craft! Using felting needles, you can bind, condense and sculpt the fibres of unspun (roving) wool to fashion shapes which you can then use to create amazing animals. By working with different coloured wools and felting your shapes to together, you are able to sculpt anything your imagination can conjure.
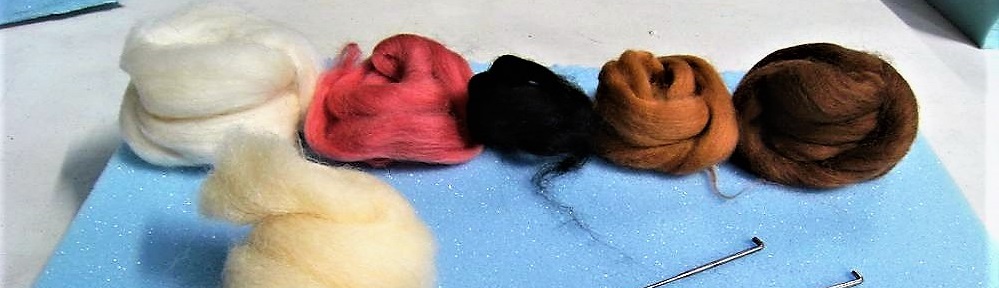
Tools and Materials
Needle felting does not require any bulky or expensive equipment and materials. All you need to get started is a good felting mat, fine, medium & heavy felting needles and some unspun wool. We recommend using merino wool to make your animals as it produces a more refined finish to your work. You will also require a coarser wool to build your core shapes before adding colour and texture to them.
As you develop your needle felting skills, you may wish to create larger pieces or animals with movement. Adding wire to your core shapes will enable you to do this, as well as helping to maintain the form and structure of your pieces.
Getting started
Firstly, you should decide which animal you would like to make! It’s best to begin with something simple so you can hone your skills before moving on to more complex pieces. For instance, you could start by crafting a cute owl or penguin which does not involve having to shape and attaching limbs or a tail. It is easiest to work on simple round and oval forms to begin with as these are straightforward to fashion and enable you to produce appealing results whilst learning how your tools can transform the wool.
You might find it easier to use needle felting patterns, at least initially. It can be hard to imagine how to create the look you want when you don’t have any prior experience. By using patterns, you can learn how to shape, structure and texture your pieces and you will gradually build up both the knowledge and the feel you need to craft your own unique designs.
Before starting your piece, please note the following:- Always place your work on a good felting mat to avoid injuring yourself or ruining your furniture!
- Needle felting involves stabbing wool with barbed or notched needles. Always use straight, upright stabbing motions, otherwise the needles will break.
- The notches or barbs on the needles wear down over a period of time rendering them ineffective and some breakages are inevitable so keep a supply of several needles on hand.
- When creating your base shapes, stop felting before they become too hard. It is possible to felt your wool until it almost rock hard but you will not be able to shape and refine it later when you add your colours and details.
- Felt your core shapes until they are hard enough to retain their shape but still allow you to refine them.
- Don’t drive the needle too deeply into the pieces. Short stabbing motions work best and will build up the density of the shapes gradually and evenly.
Sculpting your core shapes
For every piece that you craft, you will begin by creating your core shapes. Working with your coarser wool and using your hands, create rough forms of the required sizes and shapes. Then, take a heavy felting needle and stab at the shapes repeatedly. Your core shapes will gradually become denser and harder. You can refine the shape as you work and you can always add more wool to create the perfect shape later if things don’t quite go according to plan. If you are using a pattern, place each shape over the template when it is finished to ensure that it the correct size and shape.
If you are joining core forms together to create your animal, leave tufts of less compacted wool on limbs and tails etc where the joins will be created. When you place the shapes together, you can stab at this wool to compact it and fuse it with the body of your piece.
Join your core pieces together, one by one, to create the animal. Place the tufted area of the limbs, tail or head over the body and stab at the wool to fuse the pieces together.
Core shapes with armature
Larger animals and sculptures with movement will require the use or wire (armature). Use the wires to create a rough framework for your piece. For larger animals, you can save a few pennies by building bulk using wadding before adding wool. Fill your framework with wadding or felted course wool. When you have created an approximation of the required shape, begin wrapping the piece in layers of coarse wool, stabbing as you go to produce the right density.
Refining your creation
Now it’s time to bring your animal to life! You can colour and create realistic fur textures using your finer merino wool. Place wool in your chosen colour over your piece and begin felting using a finer needle.
Many animals don’t have a uniform coat colour but rather fur which is multi-tonal. You can replicate this look by blending different colours of wool together. To achieve this effect, take two or more shades of wool and lay the lengths of each colour on top of each other. Using your thumb and first finger of each hand, hold both ends of the wool and pull your hands apart. Then, lay each layer on top of each other again (fibres all in same direction) and keep repeating the process until all the wool is blended as much as you need it to be.
To create a furry effect, apply short lengths of wool in layers working from the tail end of the animal towards the head. After applying each layer, felt down the middle of the wool and fold it back on itself to produce a thicker coat. You can make the fur appear fluffier using a dog comb or felting needle with reversed barbs. Always felt gently to avoid making your fur too dense or altering the shape of your piece.
Finishing touches
Your cute creation will need a mouth, nose and eyes! You can create the shape of the nose when you felt the head. If it requires greater definition, apply small amounts of wool in a darker shade around the edges and felt in. If the animal you are crafting requires a dark snout, create the shape of the nose when you felt the head and then apply a darker wool over it. Alternatively, create the nose separately from darker wool and felt it to the face.
For the mouth, create the shape when you are felting the head and then apply coloured wool over the area or simply felt on a mouth in an appropriate colour. Ditto the eyes or use glass eyes for a more realistic look.
There are three types of glass eyes that you can consider applying to your work - glass eyes which glue on, glass eyes mounted on wires or eyes with wire loops which you stitch into your piece. These can all be tricky to work with and we recommend watching a few online tutorials before attempting to complete your animal with glass eyes!
Needle felting is a fabulous hobby which we are sure you will enjoy. We hope that our brief introduction to the craft has inspired you to get creative. There are literally hundreds of techniques to employ and little tricks to learn and we don’t have the space here to tell you about all of them. But we hope that we have given you the means to get started before discovering what you can achieve with a little practice.